The same feature is also available on the new Windows 11, but it must be enabled manually from the Settings app. The quality is handy to users who love to multitask and often have multiple Windows opened on their PC. When the inactive scrolling feature is enabled, users need to hover their mouse pointer over any opened window and use the mouse wheel to start scrolling. This frees users from the hassle of switching back and forth between opened Windows.
Steps to Enable or Disable Inactive Window Scrolling in Windows 11
Hence, if you are interested in enabling the Inactive Window Scrolling feature in your Windows 11 computer, you have landed on the right page. In this article, we will share the two best ways that would help you enable or disable the inactive Window scrolling in Windows 11. Let’s check out.
1) Enable or Disable Inactive Window Scrolling via Settings
We will use the Windows 11 Settings app to enable or disable the inactive window scrolling feature in this method. Here’s what you need to do.
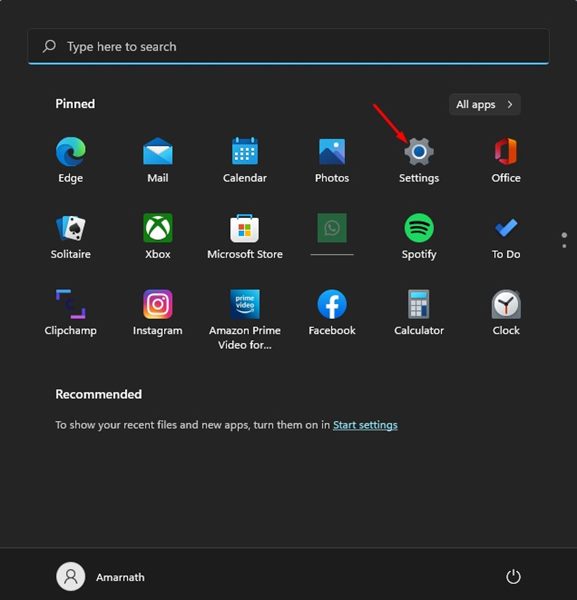
First of all, click on the Windows 11 Start button and select Settings.
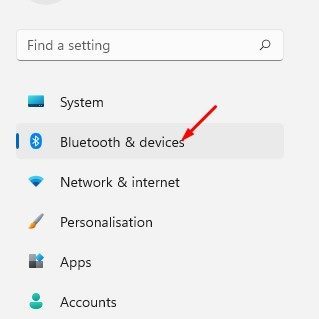
On the Settings app, click on the Bluetooth & devices option below.
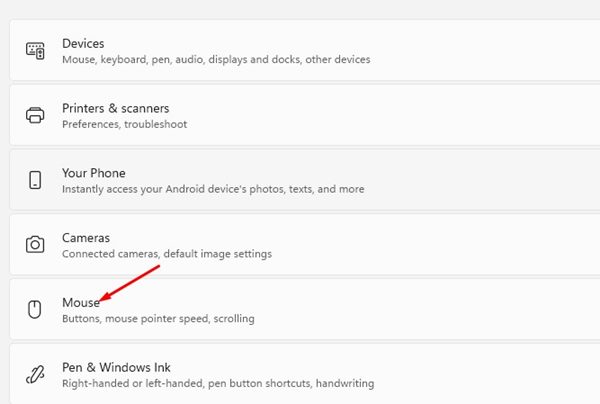
On the right pane, scroll down and select Mouse.
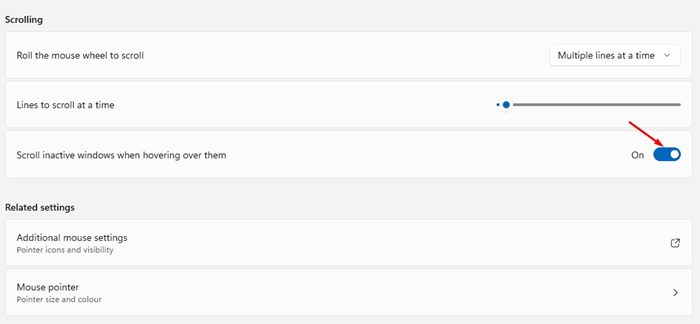
Next, scroll down and enable the toggle switch for Scroll inactive windows when hovering over them to allow the feature.
If you wish to disable the Inactive scrolling, toggle off the switch for Scroll inactive windows when hovering over them.
That’s it! You are done. This is how you can enable or disable the inactive scrolling in Windows 11.
2) Enable or Disable Inactive Scrolling via Registry
If you cannot access the Settings app, you can utilize the Registry editor to enable or disable the inactive scrolling feature. Here’s what you need to do.
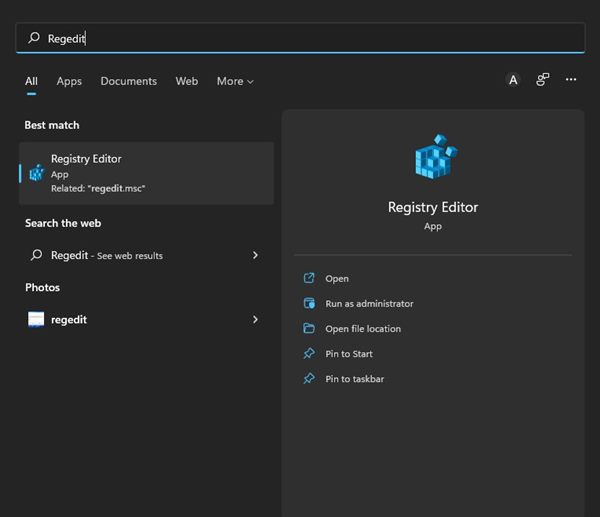
First, click on the Windows 11 search and type in Regedit. Next, open the Registry Editor from the list.
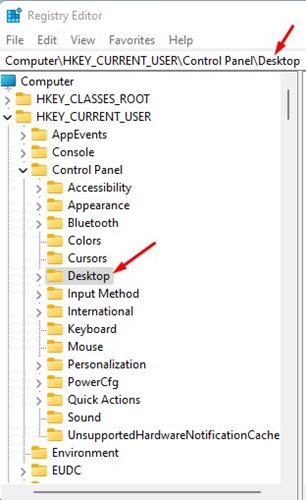
On the Registry Editor, navigate to the: Computer\HKEY_CURRENT_USER\Control Panel\Desktop
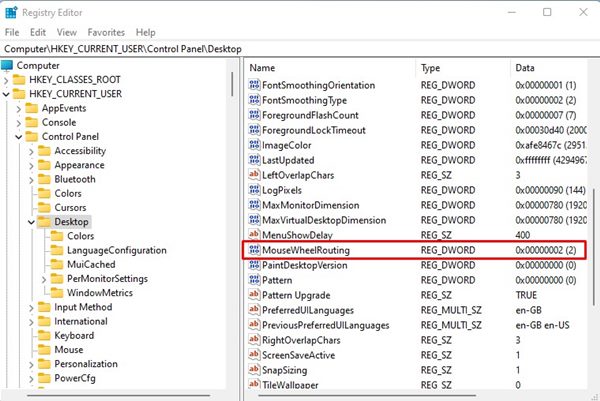
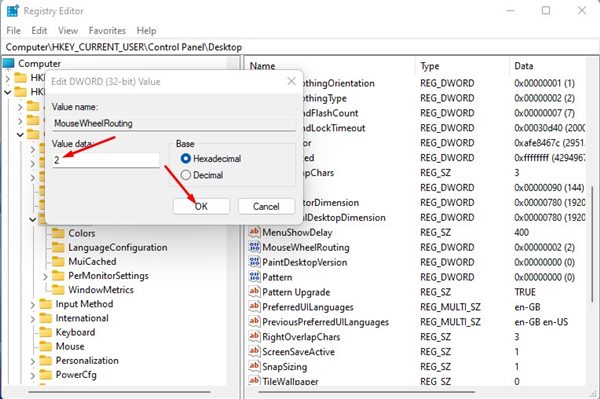
On the right, double click on the MouseWheenRouting DWORD key.
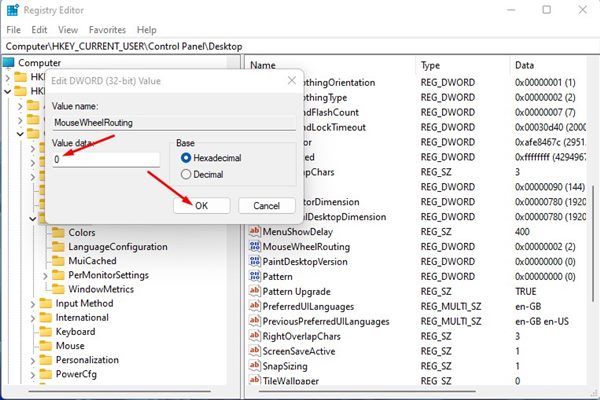
To disable the Inactive Scrolling, enter 0 on the Value data field and click on the Ok button.
If you wish to enable the inactive Scroll again on your device, enter 2 on the Value data field in Step 4.
That’s it! You can turn on or off inactive scrolling in Windows 11. Inactive Scrolling in Windows 11 is an excellent feature as it saves you a few clicks. With this feature turned on, you don’t need to click on the inactive Window to start scrolling. So, these are the two best ways to enable or disable inactive scrolling in Windows 11.