The Windows defender application of Windows 10 got a new feature called Ransomware Protection. The feature basically lets you enable the Controlled folder access, which blocks all unfriendly or suspicious apps from making changes to your important folders. So, if you don’t want an app to modify files stored in any particular folder, you can add the folder in the Control Folder Access. The feature basically protects files, folders, and memory areas on your device from unauthorized changes by unfriendly applications. Also Read: How to Create Full System Backup of Your Windows 11 PC
Steps to Add Folders to Controlled Folder Access in Windows 11
The same Windows 10 feature is also seen on the new Windows 11. Therefore, in this article, we will share a step-by-step guide on how to add folders to Microsoft Defender Control Folder Access in Windows 11. Let’s check out.
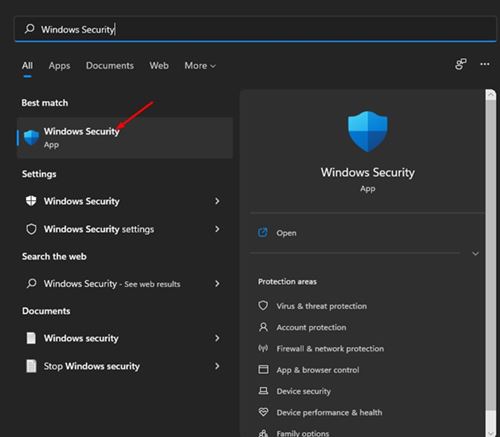
First of all, click on the Windows 11 Search and type in Windows Security. Then, click on the Windows Security app from the list of results.
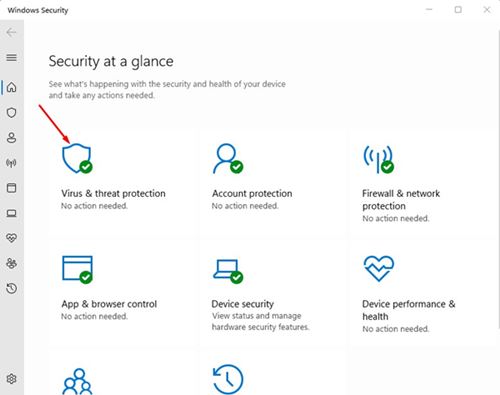
On Windows Security, click on the Virus & threat protection option as shown below.
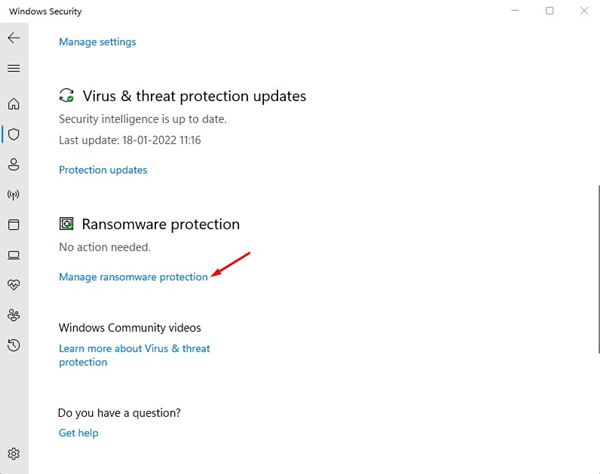
On the right pane, scroll down and click on Manage Ransomware Protection.
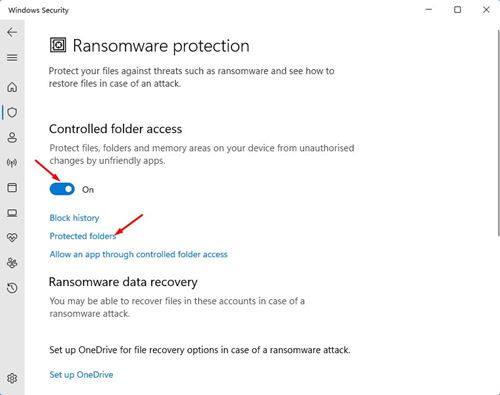
Now turn on the Controlled folder access and click on the Protected folders link.
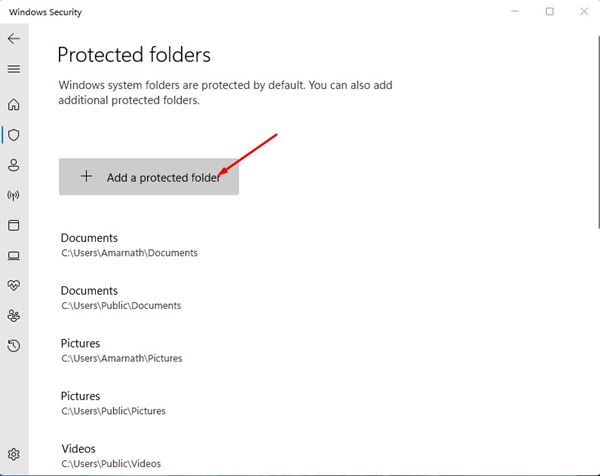
If you store your essential data in other folders, you need to click on the Add a protected folder option and add the folders with your important data.
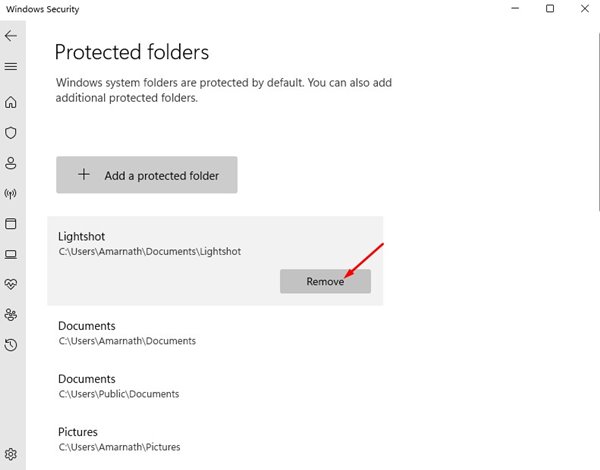
If you wish to remove any protected folder, click on the folder and click on the Remove button.
That’s it! You are done. This is how you can add a Protected folder on Windows Security app. Once you add a folder in the Controlled Folder Access, Windows security will block every suspicious app from making changes to that particular folder. This is a useful feature that everyone should enable. I hope this article helped you! Please share it with your friends also. If you have any doubts related to this, let us know in the comment box below.
